Wednesday, November 30, 2011

A dark november

So, novembers finally over. It will forever be known as the month I got a PS3 and lost all insperstion for miniatures.

Well thats not quite true. I think about the golden demon every day. But all Privateer Press related is just a pain in tja **s! Hehe

But I have a tournament comming up early januari. So. Buck up, suck it up, get going!!

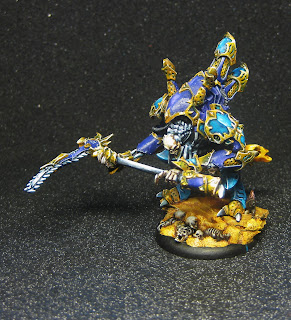
The Nightmare is done anyway. So all that is in the pipes is a converted Daragh Wrath and a bonejack with a magnitized head. 

 
 And, yeah, this is also in the pipe :)
Checking Out!

Wednesday, October 26, 2011

Gaming table Done (sort of)

Aaaand Im done. The big river is still somewhat sticky but nothing I will bother with in the near future. Im in a real bad place gamingwise right now where I basicly dont feel like doing it. But now, at least, I have a table I can decide not to play on :)

Tuesday, October 18, 2011

ork warboss WIP #3

It is nice to do something different. I have found some insperation and have returned to my orc warboss. He got some addinitonal paint today. Nice to take the camere, get some closeups and find the spots that need further work ;)
The model is part of my preparation for next years projects. I will enter a Golden Demon.

I KNOW! It is quite different from the gaming and painting of PP stuff that has been going on lately, but...I have to try it. I do love painting. So, a dash to finish some stuff for my cryx before the new year, then its Games Workshop all the way.

At least when it comes to painting. Maybee. ;)

Monday, October 17, 2011

Sunday, October 9, 2011

Gaming table and disasters (small and large)

Im all moved in. I do have some boxes left that need to go into the addict, but it is still full of the previous tenants stuff, so they get stored in the kitchen for now.

As I was moving in I decided to get some work done on my gaming table. I knew this project was bound to generate a lot of spill and wast, dust and sand all over the place so I figured might as well (since I needed to clean the place anyway after the move).

A couple of weeks earlier me and a friend had raided a hardware store for material; pink foam, and mdf boards and such stuff. I had also bought a GW battlemat and some resin for water effects. I had a clear plan of what to do. A river going through two 2" by 4" sections of board so that the river could either be going diagonally through the whole board or be in two of the corners not interrupting to much.

This is a picture of one section, almost done.


Some things left to do. I need to paint the sides black, the circle to the left got to get more sand in the edges and I am also gonna sand the edges of matt around the river. The sand is obviously going to get painted as well.

here are some closeups, which will bring me to some of the disasters the title refers to.


Thus far everything looks great. LOOKS GREAT! The bloody resin refuses to cure! It cures almost all the way through but at the surface it is still all sticky and &%#t! Aaargh! So I tested another water effect I had lying around to see if I could cure OVER the surface, kind of a protective layer. It did. It looks like this:
 
So the watereffect did not go well together with the resin. It looks lie snot. WTF!

The other part of the board was a complete disaster. It did not cure. At all! So Back to square one. Tear it all out and start over. I will have to do that to the snot part of board one as well, but I will wait until my second delivery of (very expansive) resin arrives. *whimper*

so, status as of now: 
 

  1. Pissed off!
  2. Broke!
 Next time this board SHALL be finsihed and maybe I can get some painting done. Who knows...

Till next time!


Sunday, September 18, 2011

Big Update!

I have been very productive of late. I have painted loads of stuff and played two tournaments. I been manic almost. But, now I will have a big hooby break due to moving and all the time that will consume. Also I would like to actully play the game some more. And maybe even try to see some people outside the hobby to get, well, some perspective on things.

So, First things first. For the Danish Masters, which I played, I brought a couple of new things. I painted a Stalker (I play cryx), I painted Gerlak (shown him in an earlier post) and a unit of bane thralls with UA and the obligatory Bane Lord. Also the Witch Coven got a couple of Coats.


My Cryx has been nick named "Disco Cryx", "Gay Cryx", "LCD Cryx" and "Pride Cryx" by the locals and I cant really blame them. Also I got a lot of comments from some REALLY good painters in Denmark that maybe I should choose my colors with more care :)

Well, I do know quite a bit about colors and I know how to break the rules (I think). My cryx is insane I know. But they also make me smile. Which is important I think. I hear it prolongs you life or something.

For the tournament this weekend I painted a new caster and a full unit of Mercenary's.


The tournament went well enough. 4-1 and a fifth place. Good Enough.

I Have also been fooling around with some other stuff, green stuff. I have tried to convert the screaming bell rat ogre to make the cut for my Blood Bowl team and am semi satisfied with the result. I will maybe re-do the spikes in the shoulder pads to more of the plasticard ones.


I also made this crazy ass arc node. :D

Later Skaters!

Argh! Almost forgot. Painted a little on a dwarf from Rackham to:

Now Im done! :D

Monday, September 12, 2011

Tuesday, August 30, 2011

The General

I have emerged from a bad time in my life. A time where I for once lacked any motivation to paint and just sulked around all day. It lasted a couple of weeks. Then the painting table beckoned me back and a tournament whipped me on.

The result of said tourney was 14 bane thralls painted and the Bane Lord to boot (some day they might appear here). The place I ended up in was 5th. Not bad. But I was disappointed that all kind of painting competition  was left out of the tourney.

I did however pick up this guy and painted him yesterday. He was a delight to paint and I reckon I will paint him again someday. Maybe for a trip to the USA and put him in a competition at a Con. I think I can give him a real decent paint job given more than the 6 hours he got here.

Click for a bigger picture! Regards/D

Saturday, August 6, 2011

Some WIPS pictures

Some things I worked on last week. Due to some issues that came up this week, I haven't done anything and the hobby motivation is at an all time low. So, who knows when these get done.


Sunday, July 31, 2011

MechThralls Assembely-style Painting Step-by-Step Part 3

The saga of thirty Thralls contiues

Step 6: Tubes
This is a simple step. Paint them pink and wash with lilac wash. If you want to you can then go back and highlight or drybrush them, but this is enough for me.

Step 7: Glow from the eyes
I first paint all the areas that shall glow white. Then I wash with GW green wash.
 I also apply a thin layer, the brush is almost dry at this point, of the wash to the areas I want to reflect this glow. After this I again paint white the areas I want to be the brightest.
After some touching up and further highlight of the skin they are done.
Fisnished
After finishing the bases the units looks like this.

Now I have to finish the front arc marking and re-seal them, since I got them all f-ed up by using spray sealer. Not to worry, I shall un-ruin them :)

All in all I think I spent maybe 1-1,5 hours per model. And Im happy with how they turned out. Till next time.

See ya!

Tuesday, July 19, 2011

MechThralls Assembely-style Painting Step-by-Step Part 2

So I continue the thralls.

Step five: Metals NMM

Since I am doing thirty thralls at ones, I'm doing just three high lights and one shadeing of the NMM metals. The result will be decent enough and is easy to do (although this is the most time consuming part of the model by far).

I start by base coating the metals in stonewall grey and move on to wash the whole shabang with badab black.

 I then took a break and painted all the tubing and black stuff.
The highlight is done in three steps. First I highlight with stonewall grey, then with glacier blue and a final one with bone white.


Finally I shade the whole thing by applying azuremen blue to the darker areas, and thus creating a chrome effect of sorts. The effect is good enough for the table and quite effect full from a foot or two distant.
Now I will do the rest of the thirty and then move on. Updates coming soon.

Sunday, July 17, 2011

MechThralls Assembely-style Painting Step-by-Step Part 1

30 Mechthralls is a lot of thralls. I have decided to paint them in one big go to get it over and done with. Fortunally they dont have a lot of detail and different parts so not many colors will be required.

Step One: Basecoating

I have allready based built the bases for the thralls, going with a mix of my armys bases. I.e one unit on the beach, one unit with a mixed beach and board walk base and the last one with just decking styled bases.

I proceed to base coat the horde using my airbrush and Vallejo's Dead Flesh. I do one thin sweep all over the model and then one more sweep covering all the skin parts with extra care. Dead flesh is the base for the skin.
Above a picture of the horde and below a picture of how my hands look after base coating. Attractive.

Step Two: Washing the skin

I use a purple wash from Games Workshop and wash all the skin bits with it.


Step three: High Lighting Skin

I use Dead Flesh again for the first highlight and then mix it with a pure with color 50/50 ratio for additional highlight. I dont bother making it perfect, this is miniatures for gaming after all, and in addition, they are the undead so what if they have some skin issues?


Step four: Open Flesh

I apply Vallejo's Gory Red in all the rips in the skin and all the parts with muscle tissue and then wash it with the purple GW wash. Simple but affective.

Next its time for the metals. Stay tuned for part 2.

Saturday, July 16, 2011

Update: Summer Cryx WIP

So I have finished basing all the minis just today. They are so many. Insanely many! While I wait for the green stuff on the last bases to cure I will paint some solos or light jacks. This saturday will be spent hobbying and I am hoping to get a lot done. Tomorrow I will try to get a game in. Maybe even give the new format Unbound a whirl :D

here is a pic of the rest of my armies in their entirety. Lots to do, but I have high hopes for the McThralls which I will do in a assembly line fashion. 

Earlier in the week my girlfriend asked if she could try to paint something. She also wanted to be instructed on techniques and stuff so she asked if we could kind of tandem paint the same figure. That is a figure each but the same one. 
So I dug around my bits and pieces without much hope of finding a duplicate figures for us to paint (I did not want to paint any warmachine stuff off course) and what do you know, a griffon with a high elf jumps up at me. No! two griffon with mounted high elfes. 
I hastily clean and assemble them while my girlfriend jumps in to research mode, scouring the inter-webs for background and pictures of griffins. When I have finished cleaning and assembling she has decided to do it's body in a panther scheme. A kind of cartoony panther scheme. I think that is a great idea! The picture below is from maybe 2 hours of work and is just ready for highlighting. more blue is needed off course but I think it looks great (the pictures does not do it justice :S)! 
I just showed her the basics of basecoating, glazeing and shadeing and off she went. On mine I lost patients and after said bsecoat-/glaze-/shade-demo I cracked out the airbrush and went to town. Lots of fun!


More updates soon.